Saturday, February 22, 2014

The Moon and the Madonna...


What an intriguing book theme...the Moon and the Madonna.  It conjures up visions of religious icons.  Indeed, the previous work in this book centered around this type of imagery.

Being a Moon Child, I was more drawn to the "moon" part of the theme.  In a previous moon-themed book, I had played with the texture of heated Tyvek to create the lunar surface.  I didn't want to repeat that here.  

I remembered a day back in September when a few art friends and I got together and played with Citrasolv.  We took National Geographic pages and saturated them with the solvent.  In time, our pages morphed into glorious cosmic backgrounds.  I pulled out the pages I had made and found a set that reminded me of Carl Sagan's Cosmos.  It would serve as the perfect "universe" upon which I would place my moon.

But what to do with the moon?  I thought of the Man in the Moon and that led me to picture Madonna in the Moon.   For some reason, I thought of the iconic image of Cher in the Moonstruck movie poster.  Cher in the Moon.

For fun, I created a "flip" moon page so I could feature both Madonna in the Moon as well as Cher in the Moon.  So here it is--a fresh take on the Moon and the Madonna theme.  What do you think?  

Friday, February 21, 2014

Four Quarters Page Challenge


Here is my piece for the February page challenge in the on-line Altered Book class I am taking.  I was surprised at how long it took me to #1 find an image that I wanted to work with and #2 gather the proper design elements for the challenge.  Images were either too big or too small.  I didn't have the right color or pattern tissue paper.  After pouring through too many magazines to count, I finally came across this image of Marilyn Monroe in a NYC gallery guide a friend had given to me and decided to build my challenge page around her photo.

I gessoed my pages and painted them white.  I placed torn pieces of black and white damask patterned tissue paper in diagonally opposing corners.  I temporarily placed Marilyn in the lower left hand quarter as I played with the rest of my layout.  Initially, I was going to use a luscious red satin ribbon to frame my page, but it was too wide and ultimately too “heavy” for this page.  After some digging (more like excavation) I found this rhinestone trim which I was able to cut down to the perfect width.  I used two strips along the top and bottom to frame my piece.

By now, I was happy with where I had originally placed Marilyn’s photo,  I put the image on white cardstock and gave it a small margin which made it look like an old black and white photo.  I secured the bottom with double-stick tape and used foam mounting strips for the top of the photo for added dimension.

For my text, I wanted to experiment with the re-positional nature of placing text onto deli paper and using it as a collage element.  Since I didn’t have any deli paper, I printed my text onto tracing paper.  I chose a font that went with the overall feel of the page—romantic, dreamy, classic.  I placed the text in the remaining quarter and affixed it with liquid matte medium.


For that something extra to tie everything together, I gave Marilyn a diamond necklace and bracelet (Swarovski crystals).  I used a rhinestone flourish to connect the photo to the text.  I couldn’t resist adding a red lipstick kiss (sticker) for a punch of color.


Tuesday, February 18, 2014

Chunkies Are Back!


After a brief hiatus, I am happy to announce that chunkies are back!  To get us started, our theme for February was Valentines, Hearts & Love.  

I decided to use up some of the text pages that I have removed to thin out several of my altered books.  I took out my Big Shot and started making lots and lots of heart shapes.  I took seven hearts and folded them in half to create a 3-D heart.  I secured four of these 3-D hearts to each of my chunky pages with brads.  I added just a hint of color to the edges of my hearts with an inkpad.  Of course, my pages would not be complete without a little bling or hardware, right?  So, I selected a heart-shaped charm which I suspended on a chain anchored between two of the hearts. 

Sunday, February 16, 2014

A Sunday Spent Boiling Books

Last weekend, I spent the day with art friends making two batches of boiled books. We each gathered and brought plant material to share.  We even had a food section that included carrot, sweet potato, beets, baby bok choy, red onion, yellow onion skins, blueberries and pomegranate!


Opening your books after boiling is a lot like Christmas because with this process, you never quite know what plant material will leave color or texture.  


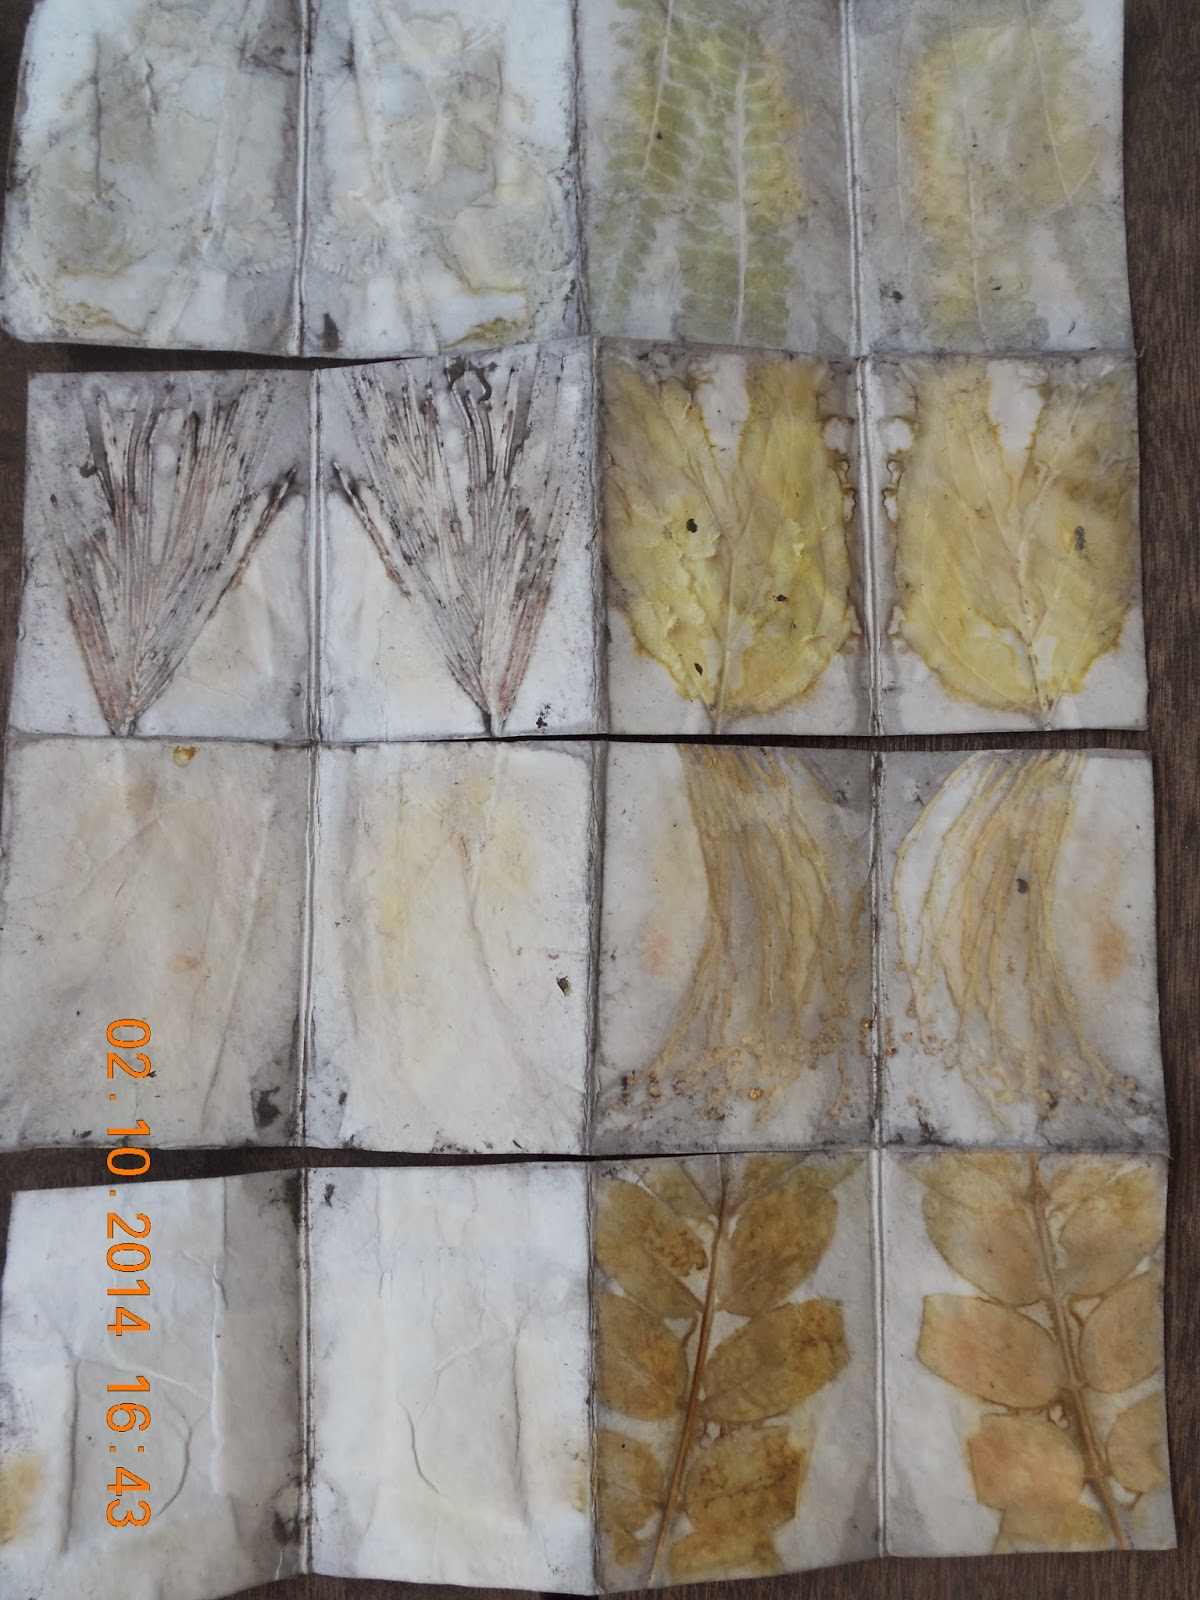
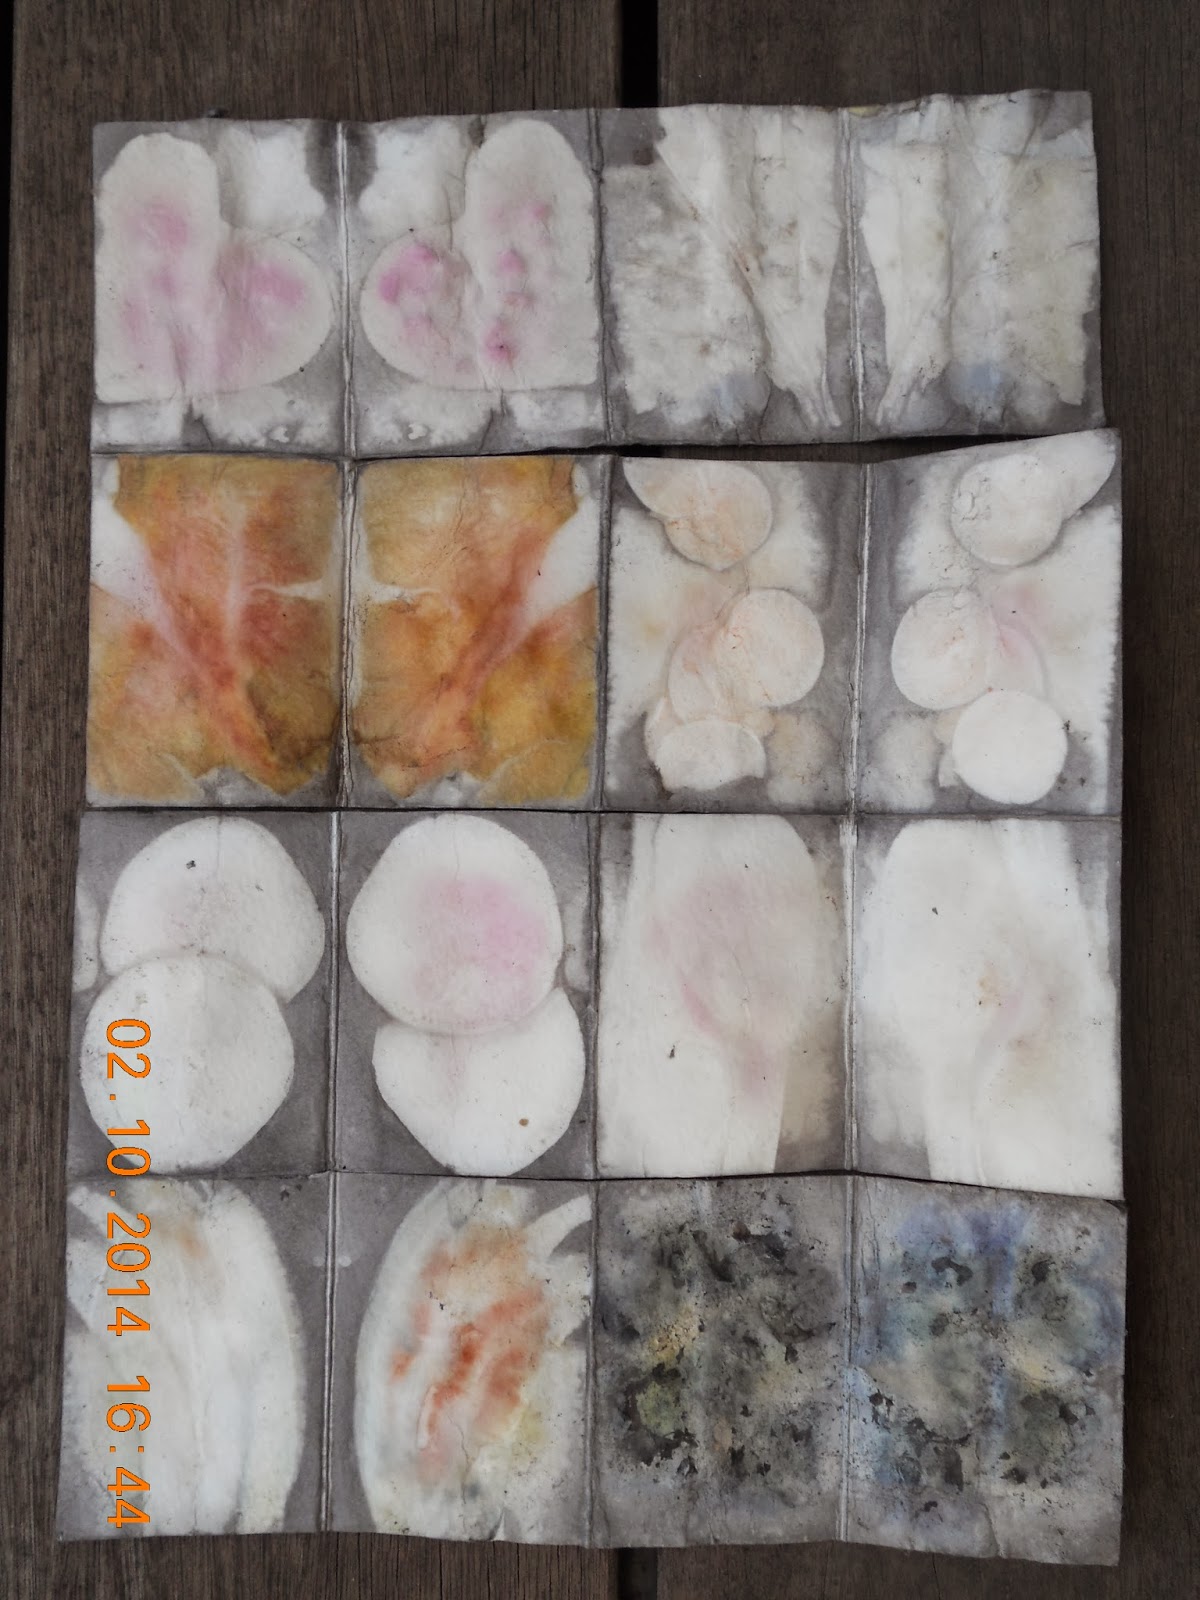
This is how my four books turned out
(front and back):


I just love how the color and texture came out on some of the pages:


I started making covers for my boiled books.  The two on the left are covered with distressed looking scrapbook paper.  The two on the right are covered with handmade papers that I embossed. 


I used the Artistcellar "Seafoam" stencil to emboss the brown cover on the left.  I used an embossing folder to emboss the green cover on the right. 


Friday, January 10, 2014

Romance


I am taking Lisa Vollrath's "Year of Altered Books" on-line class.  Each month, she shares a technique that you can use to alter books.  

January's lesson--or should I say lessons--focuses on backgrounds (something I am eager to learn more about!) and she covers paints, gesso, glazes, stamping, stenciling, brayering, layering, drybrushing--whew!

At the end of the lessons, Lisa challenges you to create a simple page using the techniques that we have learned.  Just paint, one figure and maybe a word.  How I was tempted to add embellishments, but she promised we would get to that later.  For now, just concentrate on the paint and layering.

Since I have an altered book to work in (as opposed to a practice book), I decided to use that book for this challenge.  The book is one I've worked in previously.  It's Lorraine's "Colors" book and this month, Lori was supposed to work in it.  I decided to do a spread for Lori.

My palette for this page was inspired by the title of Lorraine's book "Crimson."  I was leaning toward a monochromatic color scheme--shades of red.  Calling on Lori's muse, I was immediately drawn to Victorian and vintage things.  Glancing through my stacks of magazines, this image stopped me.  She was perfect!

The pages I chose were in between chapters of the book and there was a lot of blank space on the pages which I didn't like.  Using a trick of Lisa's, I tore text from another page out of the book and adhered the text to the blank space.  Now I had two pages full of text.

As Lisa had taught us, I started by prepping my page with a red glaze made from red acrylic craft paint mixed with liquid acrylic medium.  I definitely need practice getting my tone to be consistent, but that's what I get for trying to mix my glaze on the fly as opposed to mixing up a batch in a small squeeze bottle.

Next, I added a thin layer of tissue which was really a cocktail napkin with poppies on it.  I tore the red poppies out and adhered them to my pages using the glaze.  When that was dry, I added my figure and more glaze.  At this point, I think because I was not able to get a consistent tone to my red glaze, I decided to use just the clear acrylic medium.  As you can see, there is just a hint of red covering her.

Lisa does this amazing stamping work with gesso and various lids, eraser heads and bamboo skewers.  She makes it seem so easy and effortless.  I was not quite ready to emulate her style and instead went with a stencil that I liked and thought would complement what I had already done on my pages.

I struggled with whether to use a darker shade of red paint with a stencil or a rubber stamp and ink pad.  Ultimately, in keeping with my own personal style, I opted to use a gold metallic marker with a paisley dot stencil.  

When the page was done, the first word that came into my head was "romance" so that is what I stenciled.  I am thrilled that I took Lisa's challenge to heart and tried something new and a bit out of my comfort zone.  Most of all, I am happy that the spread really has the feel of something I think Lori could have created for Lorraine's "Colors" book. 


Sunday, January 5, 2014

Koinoniphobia!


Wow, it has been awhile since I created anything and I was really feeling rusty as I started to tackle Pat's "K is for..." book.  It's a pretty open-ended theme which is what made it a bit of a challenge for me.  I began to list words that I like that begin with the letter K.  Kitsch, Kinky, Kinetics...then I went to the internet and found a bunch of lesser known "K" words.  When I read the definition of "koinoniphobia," I knew I had found my word.

Koinoniphobia is the irrational dread of being in a room full of people or an abnormal fear of being in the company of a group of people.  Who knew?

I actually worked my spread for this book backwards.  I started with the "room full of people" part.  Found a few "Where's Waldo?" images on the internet, printed them out to do a packing tape transfer.  The pages of the book were slightly larger than my Waldo tape transfers, so I had to do the backgrounds in two parts.  I cut an irregular line which helped mask the place where the two pieces join.  If I had left a straight edge, it would have looked too obvious.

In keeping with Pat's theme, I knew I wanted to do a large cut-out letter "K."  I initially thought I would put the "K" on the right hand side of the page.  This was mainly because the downstroke of the letter K would provide a good anchor (along the full length of the spine) for the cut-out.  Yet, placing the "K" on the right side interrupted the flow of my spread.  In the end, I decided to move the "K" to the left side of the page and cut it out in such a way that it still had enough support and strength.  

Since the pages were not that thick, I glued 3-4 pieces of cardstock between four book pages.  Then I cut out my free-hand letter "K."  Red seemed to be the color that would compliment the room full of people who were now taped to the following pages.   I was toying with the idea of defining the word on the right side of the letter "K."  At a recent playdate, my friend Debbie, suggested I make a door on the right side of the page.  Then the door page would turn (open) to reveal the room full of people.  Brilliant!

I painted my door red and used crackle medium to give the door that distressed/weathered look.  Of course, because I had worked my spread backwards, I didn't want to use a brad for my doorknob because it would damage my tape transfer on the opposite side of the page.  I ended up using a piece of foam adhesive and some Tacky Glue to secure the brad on--instead of through--the page.  Lastly, for additional detail, I used a decorative die-cut to add dimension to the center of my door--not unlike a real door would have.