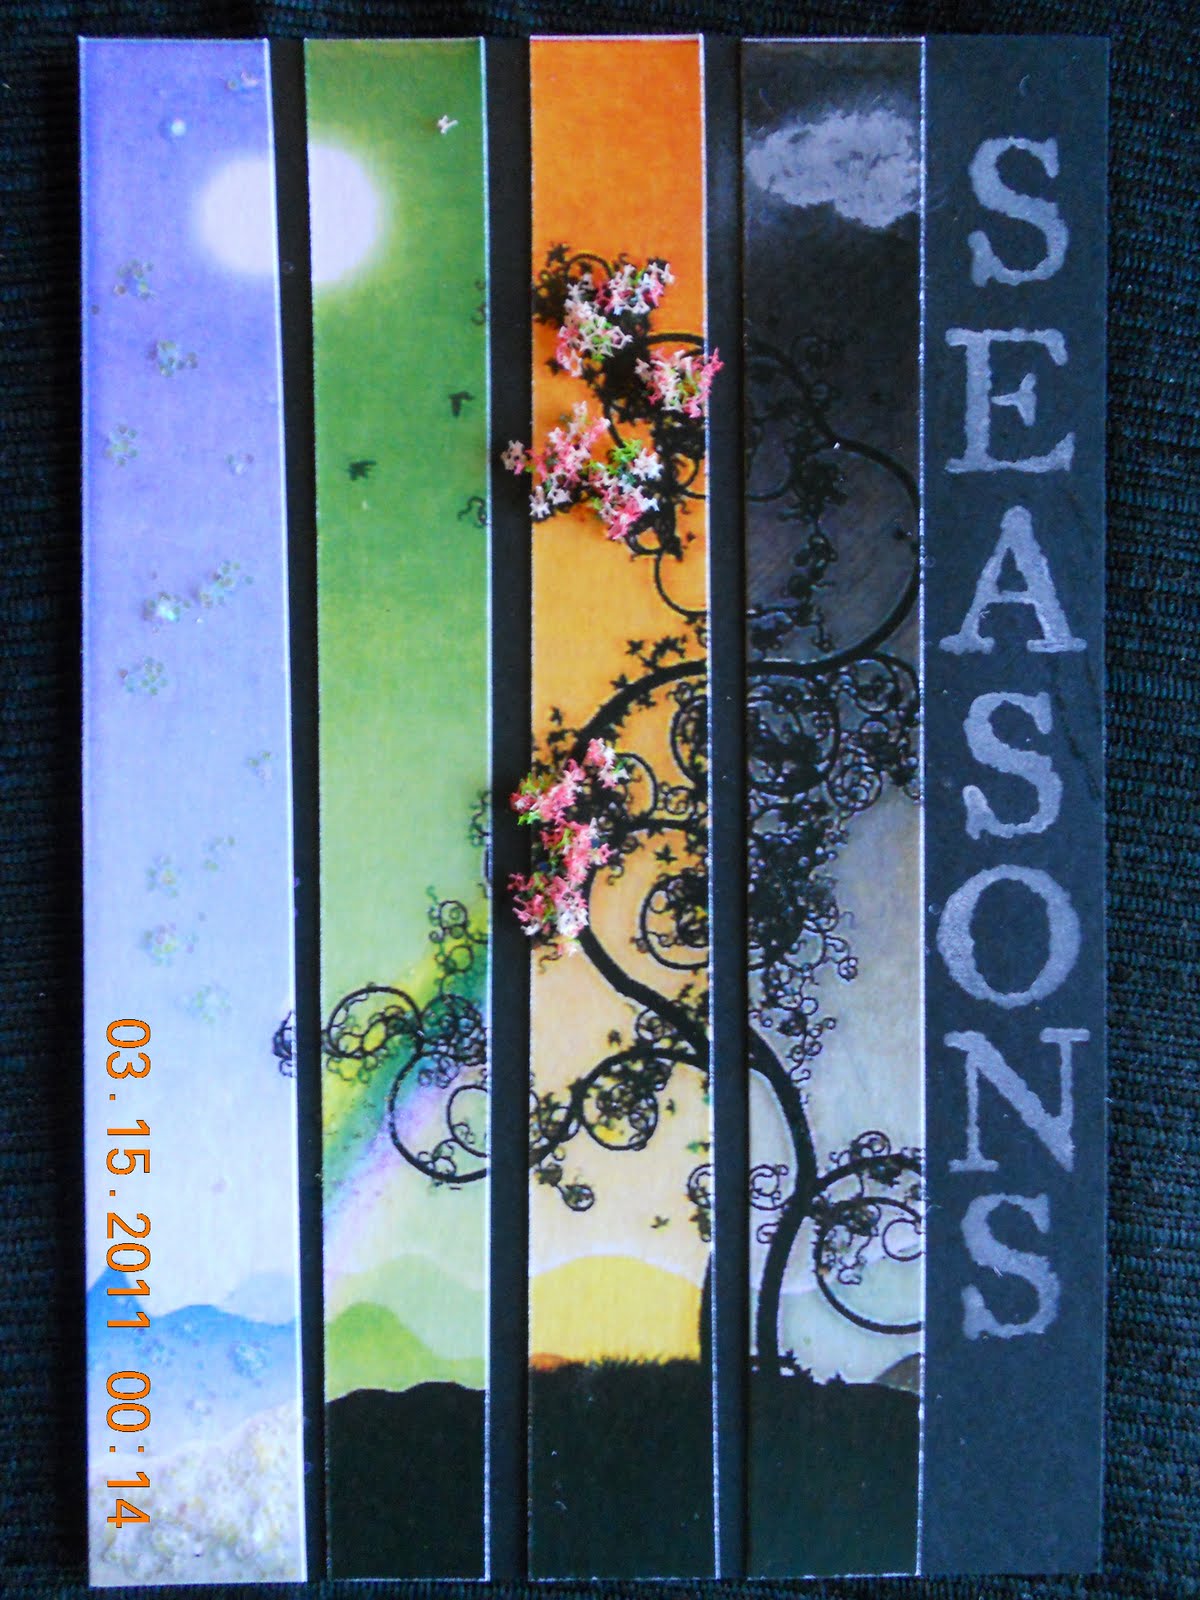
 My latest inspiration card--Watching the Seasons Change. One image, four seasons and a little embellishment.
Saturday, March 19, 2011
Inspired by the Seasons
My latest inspiration card--Watching the Seasons Change. One image, four seasons and a little embellishment.
The Seasons


When I received Nola's book on "Seasons," I wondered whether I would do Winter, Spring, Summer or Fall. Well, why not all? I adore Alphonse Mucha's art nouveau style female figures. He created four beautiful women in his series called "The Seasons": Hiver (Winter), Printemps (Spring), Ete (Summer) and Automne (Fall).
I wanted to find a way to showcase all four seasons in this compact little book (5 x 7). I decided to create windows (or doors) that would open to reveal each season. I printed the images on vellum to allow the words of the book to show through and added a transparency to make it look like a window pane. I used a piece of cardstock that I spray painted gold to frame the four images. Mrs. Grossman's ScrapMetal sticker paper was a great way to add metallic accents to the doors. Antique-looking lock and key brads from Spare Parts provided the finishing touches.
Friday, March 11, 2011
A Few More of My Fairies
 Briar Rainbowdancer
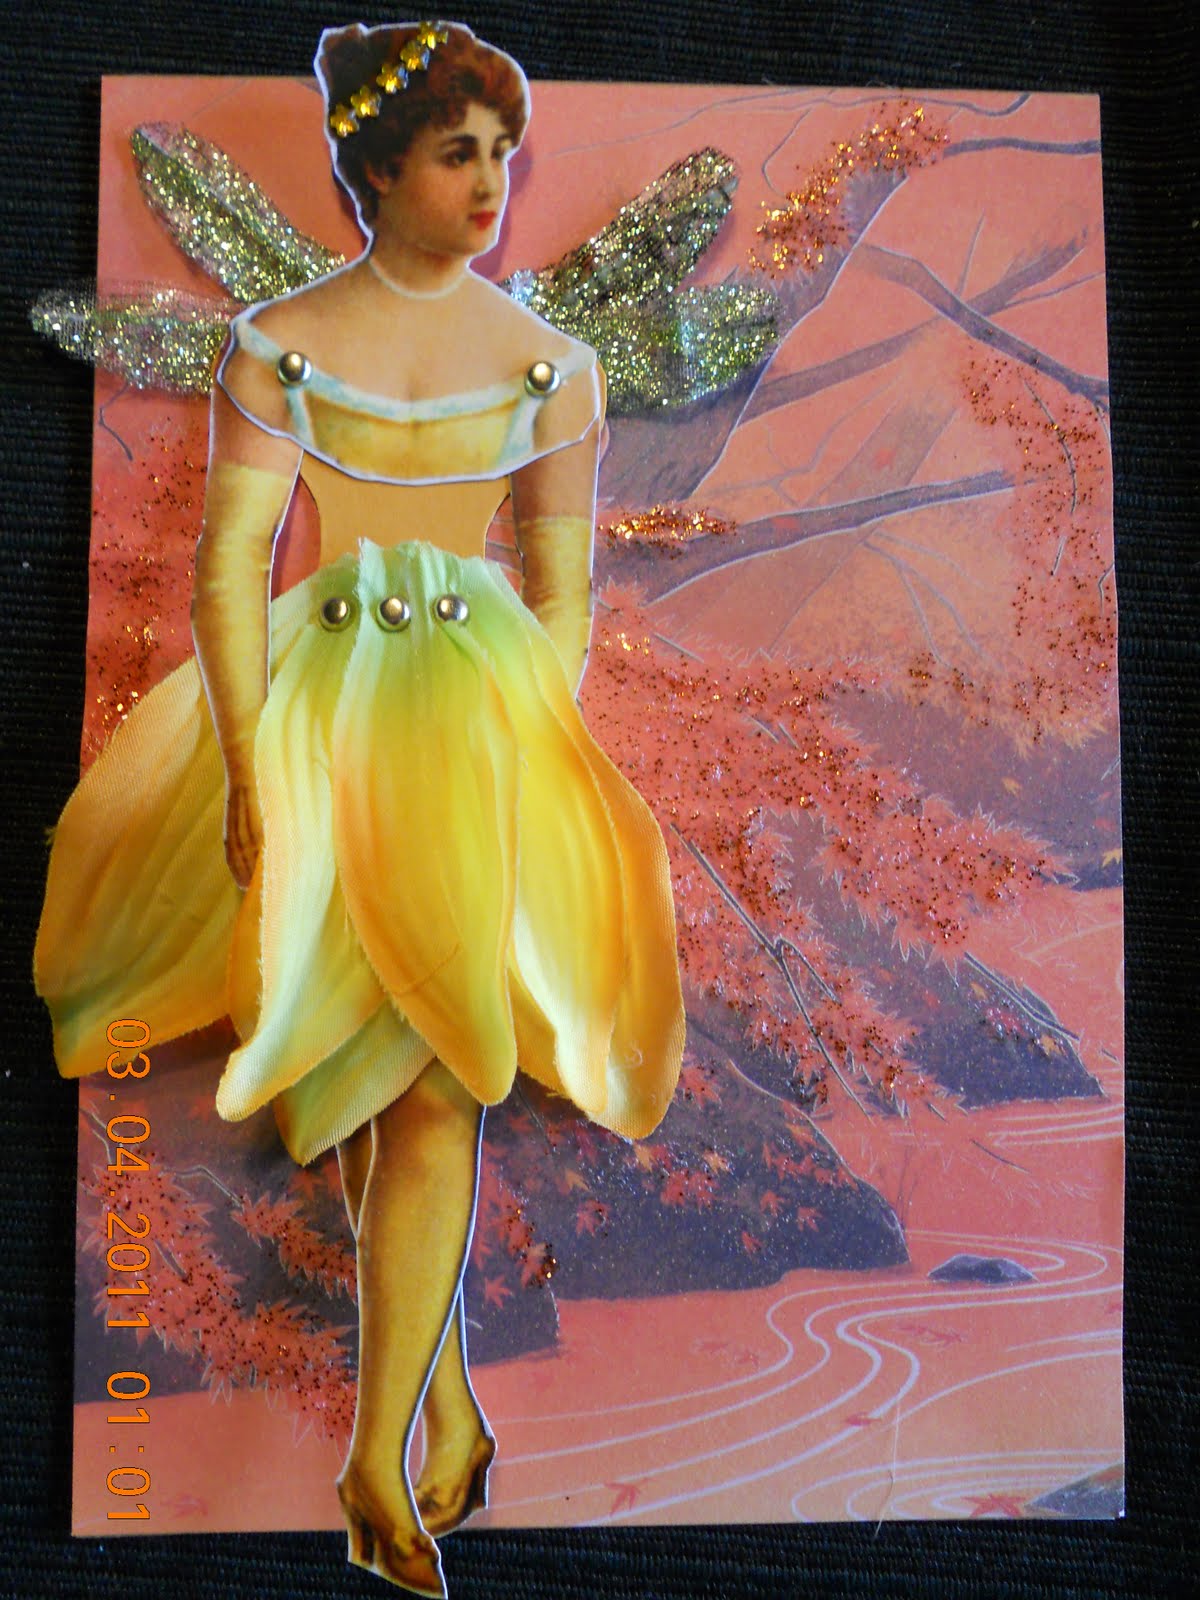 Oak Elfweb
 Fidget Reedtree
 Buttercup Goblinglitter
The top picture is a 4 x 4 page I created for a fairy child swap. There are 12 of us in the swap. Each of us took a photo of ourselves as a child and made her into a fairy. We were also asked to pick a word to describe our fairy. Our adult photos are on the back of the page. I can't wait to see how everyone else's fairies turned out. The remaining fairies are 5 x 7 cards I created for friends.
Saturday, March 5, 2011
Women of Courage
 I decided to create a tribute to Rosa Parks in Chris' book "Women of Courage." A number of people had worked in the book by the time it came to me. Not only were many of the popular heroines already taken, there were only a few spaces left to work in the book. Kathy, who had the book before me, had decorated only one page. I decided to use the other side for my spread.
I chose Rosa Parks as my subject. She was an amazingly courageous woman who refused to give up her seat on a public bus to a white man during the height of segregation. This single act fueled the start of the civil rights movement.
My spread uses a packing tape transfer of the iconic image of Rosa Parks on the bus. I placed the tape transfer onto a weathered-looking piece of scrapbook paper. Next, I took black tulle, gently gathered it and stapled it to a chipboard backing. I attached the chipboard to the scrapbook paper using decorative brads and tied the ends of the tulle into a bow at the bottom right corner of the page. I added a jeweled embellishment on the bow to complete my page. Here's to you, Rosa Parks.
Saturday, February 26, 2011
Meet More of My Fairy Friends
 Nettle Hailtree
 Briar Goblinglimmer
 Feather Saturnweb
 Briar Rainbowfly
 Oak Elfshimmer
 Columbine Goblindancer
 Columbine Elfwand
 Fidget Goblintree
 Gossamer Reedfrost
 Gossamer Reedshimmer
Saturday, February 19, 2011
String Art Mandala

 Rosemary made the most amazing book for this round. Her theme is mandalas. She asks each of the artists to create a mandala about 8 1/2" in diameter. Her book holds several pockets to house each of the mandalas. Let me tell you, there are some pretty tough acts to follow in this book! Rosemary made a beautiful iris folded mandala to decorate the cover of her book. Debbie West made a replica of the Rose Stained Glass window using a transparency and alcohol inks. Mike created a kaleidoscope effect using photos of Nelson Mandela (the "Nelson Mandela" mandala) and Howie Mandel (the "Howie Mandel" mandala)--hilarious! And DebZ did the most fabulous free-hand mandala. How could I follow acts like that?
Fortunately, I found a beautiful piece of scrapbook paper that inspired the mandala I made for Rosemary's book. It reminded me of a beautiful persian rug. But in order to make it into a mandala, I decided to decorate it with string art.
I started by reducing the decorative scrapbook paper until the circle in the middle measured 6" in diameter, then mounted it onto chipboard. I used a pattern that called for 80 points. Traditional string art utilizes small nails, but that would not work for an altered book. Instead, I carefully placed 80 mini brads around the 6" circle. Once the brads were in place, the fun begins!
This pattern is done in three sections. I used the black string for the first section, white string for the second section and the gold string for the last section. I followed the stringing sequence for the first section--or tried to. Somewhere along the way, I lost track and had to improvise. Stringing for the next two sections was much easier. Here is the finished product!
Sunday, February 13, 2011
Exploring the Dark Side of Halloween


 I had the privilege of working in Gretchen's Dark Side AB this week. I am not in the RR, but welcomed the opportunity to do a "guest" spread. The theme of her book is the Dark Side of Halloween. I found a factoid about Halloween that immediately caught my attention. It reads:
"Halloween shows some similarities to the Celtic Samhain festival which took place on the eve, October 31st and the day of celebration, November 1st. The Celts believed the veil between this world and the next became blurred at this time of year which marked the transition from summer to winter."
I envisioned a spread using a torn window separating summer and winter. I found a beautiful picture of flower-filled meadows (representing summer) and a cold, dark scene (representing winter). I printed out the factoid onto a transparency and sandwiched it between the two sides of the torn window. I added a piece of gauze which created a "veil" effect. I embellished the summer picture with a product called FlowerSoft which adds dimension and a nice spongy texture in a variety of pretty colors. Finally, I embellished the winter picture with iridescent "snow" (on sale for 90% off after the holidays!)
Subscribe to:
Posts (Atom)


